Automation Anywhere Callbacks
Overview
From version 11.3.2 of Automation Anywhere, Callbacks can be used to retrieve outputs of your bot directly from your bot execution. Bizagi supports callbacks to retrieve outputs directly from the bot without the use of a Metabot.
To use this feature, you must create a new endpoint in your Work Portal. This article will explain how to open this endpoint.
To configure an Automation Anywhere Callback, complete these steps:
- Configure the callback in the Control Room
- Configure the callback in the Automation Anywhere connection in Bizagi Studio
- Configure the security definition for your callback
Endpoint format
This endpoint URL must always have the following format:
[Work Portal URL]/api/rpa/automation/callback
Your Work Portal URL is the URL used to access your Work Portal. Usually, it is built using the following pattern:
[http or https]://[Machine name]/[Project name]
From now on, your endpoint URL must be an exact coincidence at any step of the process to successfully execute the Callback.
Automation Anywhere configuration
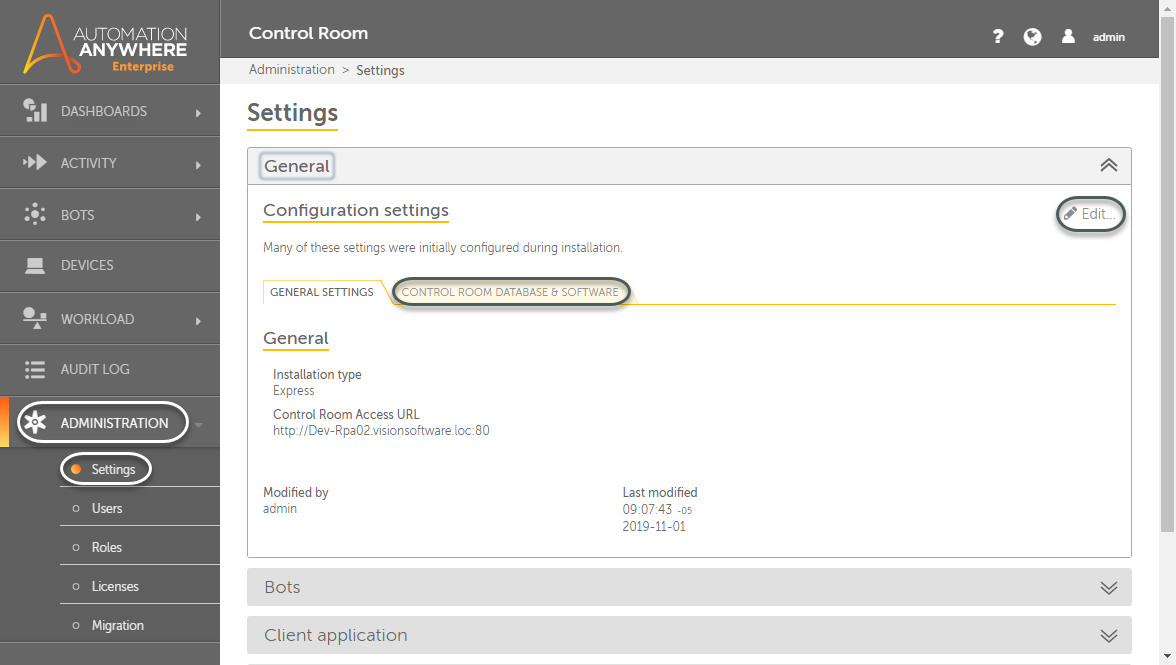
The first step to configure your Callback integration is to activate it in the Control Room. Follow these steps to activate it:
- Log in using an administrator account.
- Go to Administration > Settings > CONTROL ROOM DATABASE & SOFTWARE and click Edit.
- Scroll down to the Deployment settings and click the big plus icon on the Callback URLs section.
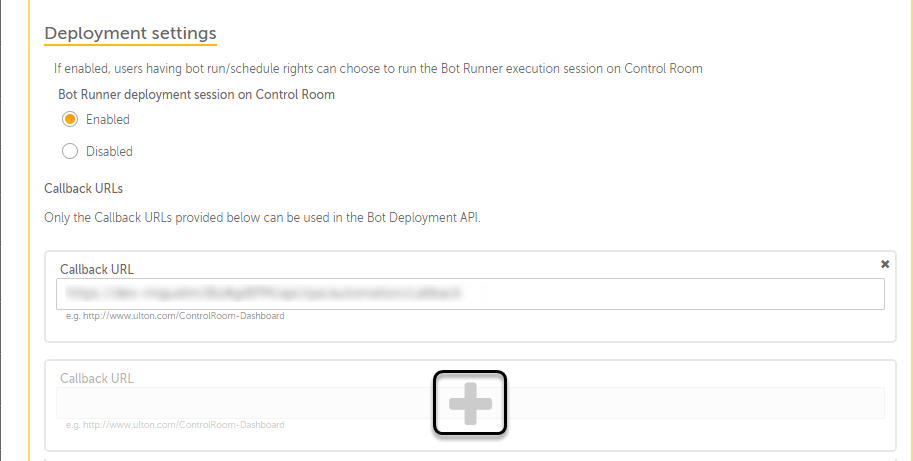
- Write your Callback URL.

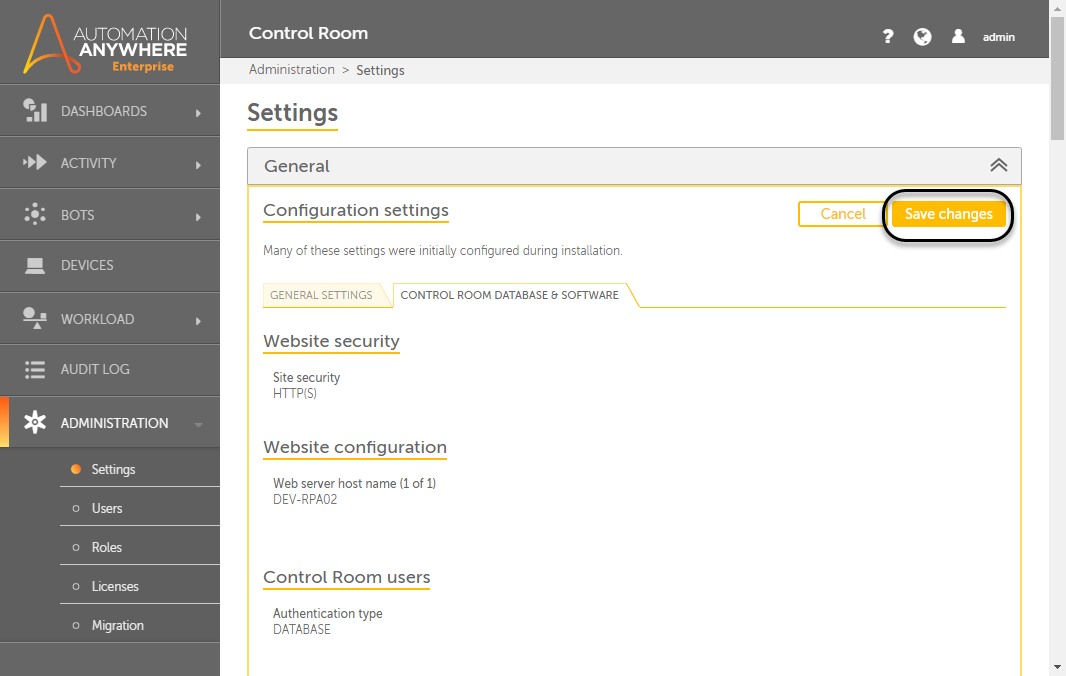
- Scroll to the top of the window and click Save changes.
Security configuration
To allow access to the Callback endpoint in Bizagi, you must create an authorized group of users that can use this service. This must be done at the individual process level.
Follow these steps to configure your security access for each process:
- Go to the Expert view and in the Security tab, navigate to Authorization > RPA > Callbacks.
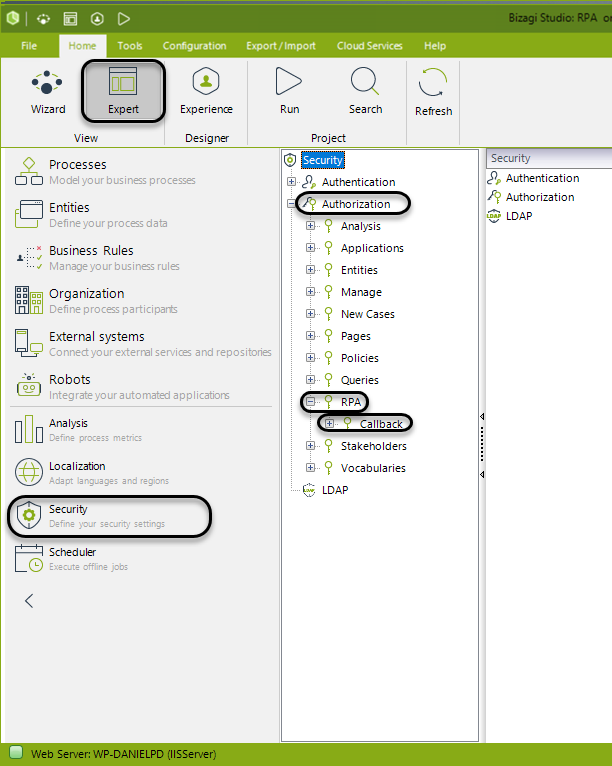
- Here, find your process that uses Callbacks.
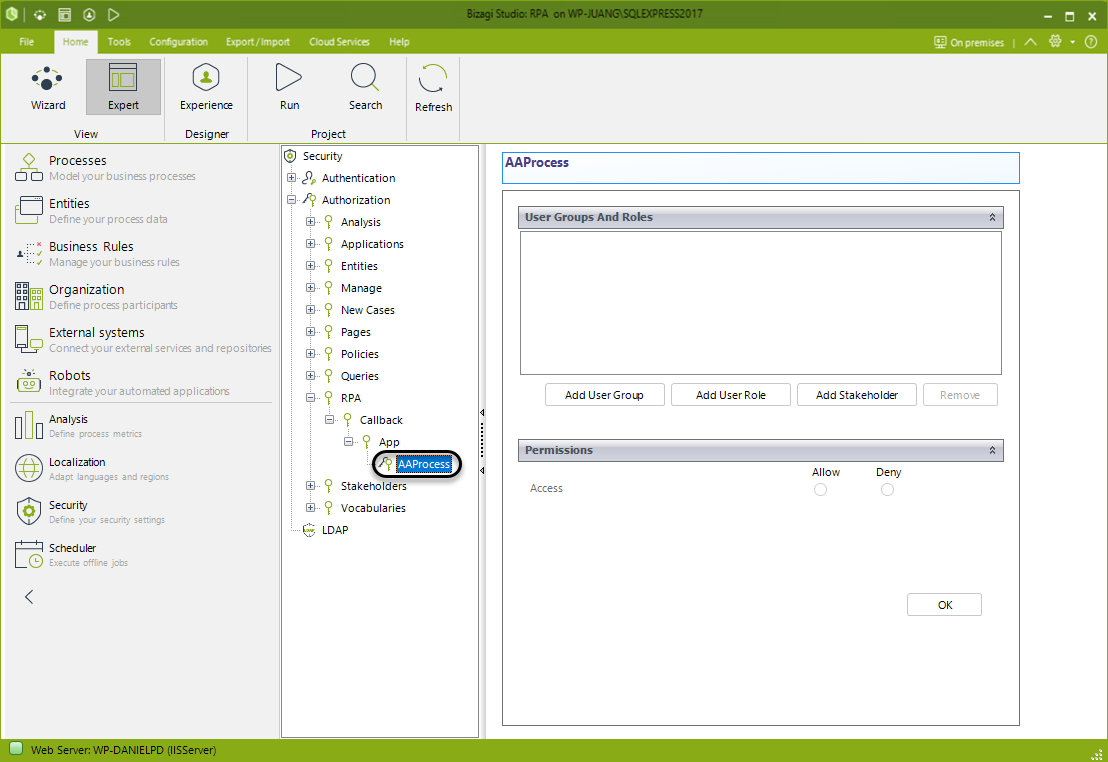
- Add either a User group, Role, or Stakeholder authorized to access the process.
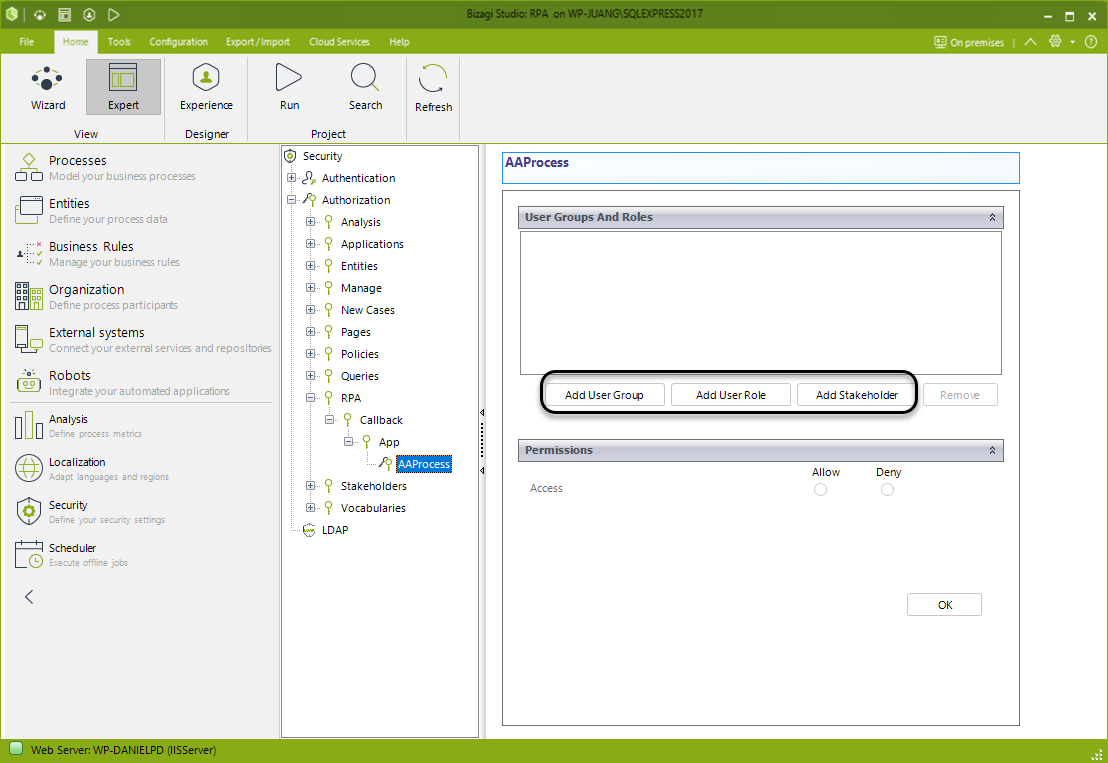
- Select the Allow option and click OK. This new user is now authorized to work on the case, but the Callback needs an RPA token generated by this user.
RPA Token
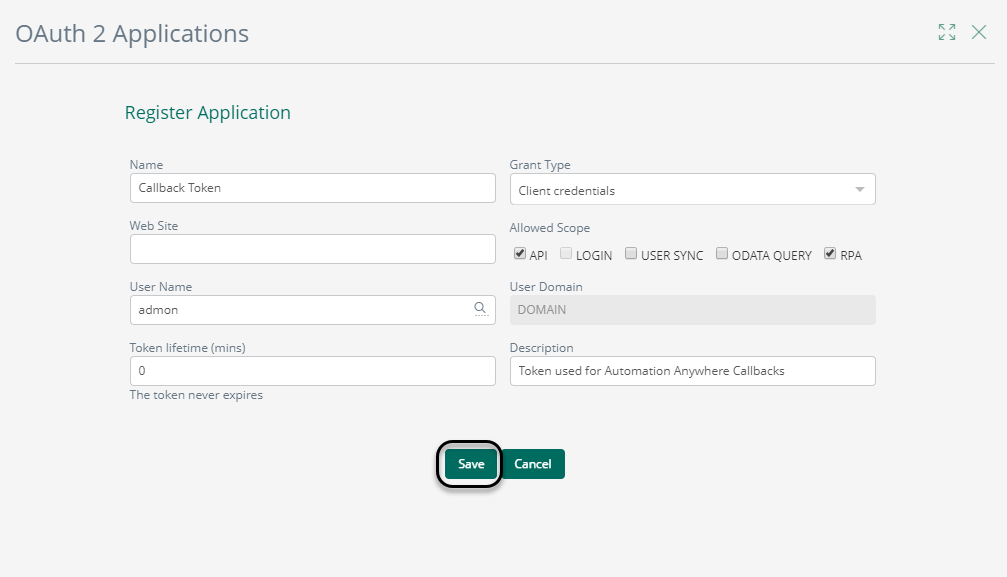
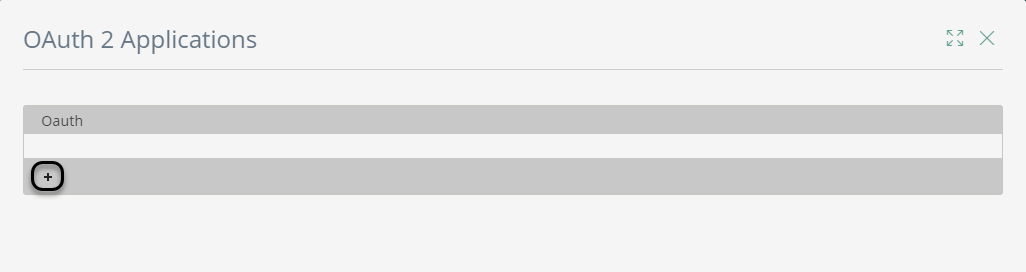
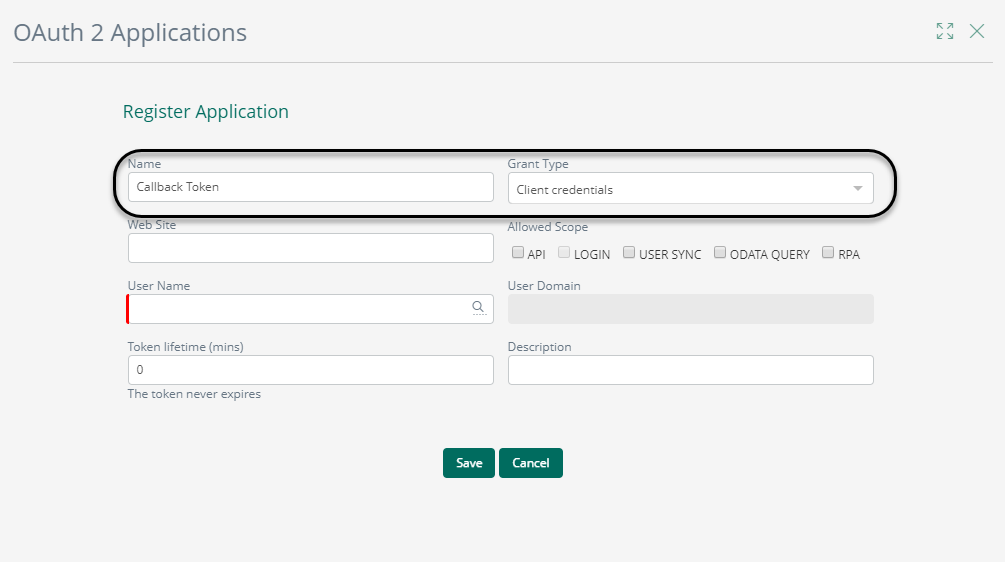
- Log into your Work Portal as a user with rights to create OAuth Tokens. Go to Admin > Security > OAuth 2 Application.

- In the new panel, click the plus icon to add a new application.
- Give it a Name and select the Grant type as Client Credentials.
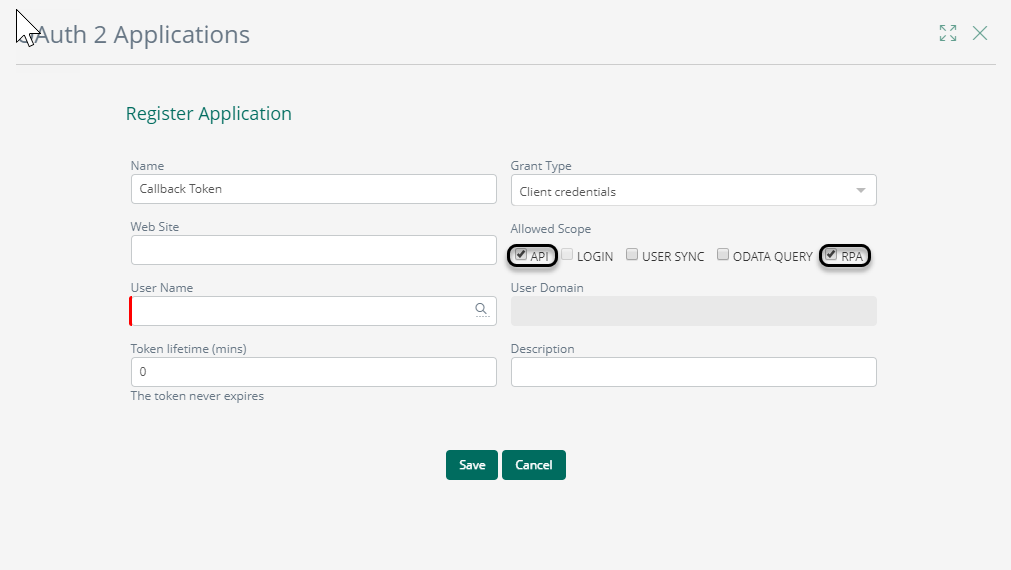
- Check the API and RPA Scopes.
- In the field User Name, select one of the users previously authorized by its Group, Role, or Stakeholder, and add a Description.
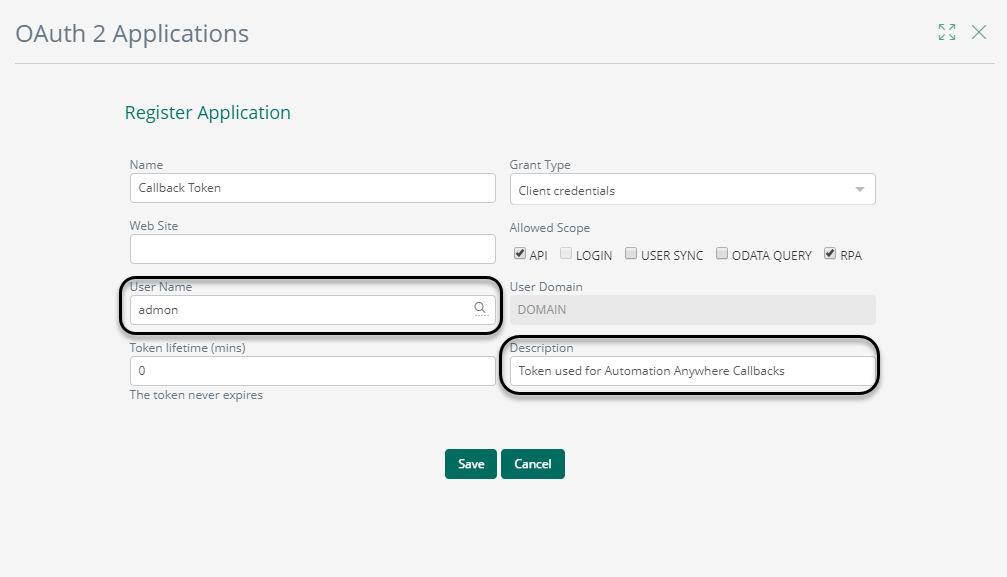
- Finally, click Save. At this point, your Bot using callbacks is ready to run.